IMS UPGRADE KIT INSTRUCTIONS
STEP BY STEP INSTRUCTIONS: IMS BEARING UPGRADE
EPS recommends professional installation for the Eternal IMS Fix. Please take all precautionary safety measures. We also recommend putting the engine in TDC and locking the crankshaft and camshafts in place to assure there is no chance of jumping timing while working on the intermediate shaft and its bearing. Please read through the COMPLETE instructions to familiarize yourself with the process, BEFORE you attempt to do it for the first time.
TORQUE SPECS:
- m 6x1 12-15 ft/lb
- m 10x1.5 30-35 ft/lb DRY- USE THREAD LOCKER (loctite)
PARTS INCLUDED:
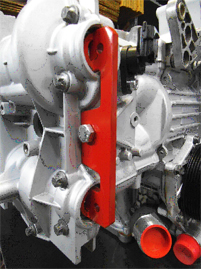
- Eternal IMS Bearing Flange
- Eternal IMS Bearing Support Shaft with Nut
- Eternal IMS Thrust Roller Bearing

ADDITIONALLY, YOU WILL NEED:
- Flat-bladed screwdrivers
- Selection of sockets including 32 mm for chain tensioners
- Selection of wrenches
- Hex Allen wrench for oil plug
- C-clip removal/insertion tool
- IMS Extractor Tool
- Eternal IMS Fix insertion tool
- Metal pick (for RMS removal)
- Soft-faced mallet
- Oiler
- Grease
- Thread locker
- Work gloves
- Rags/Paper towels
These instructions assume that we will start with the transmission already REMOVED from the vehicle. MAKE SURE THE ENGINE IS WELL SUPPORTED USING A STRONG ENGINE STAND

STEP 1: Install crank pulley lock pin to lock engine in place.
STEP 2: Remove both front cam covers for bank 1-3 to access the cams.
STEP 3: Install cam holding tool for bank 1-3.
[DO NOT JUMP THIS STEP!! Major engine damage may result if crank and cam are not locked during this procedure.]


STEP 4: At this time, inspect the Rear Main seal for sings of leaks. If it is leaking it would be wise to replace it after installing the Eternal IMS Fix.
With a catch bin in place, remove the oil drain plug and completely drain the engine oil. Using a 32 mm socket, remove chain tensioner bank 1-3. Use a bin to catch any dripping oil.
STEP 5: In like fashion, remove chain tensioner 1 IMS to crank.
Keep in mind that the two tensioners are not interchangeable, so maintain them separate and labeled so as not to confuse them.
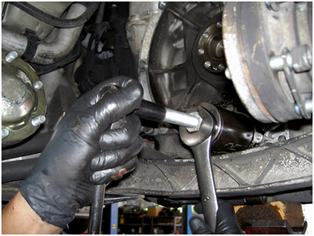
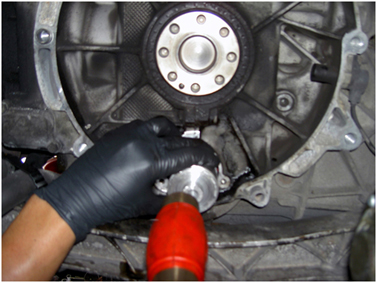
STEP 6: Now, move to the IMS.
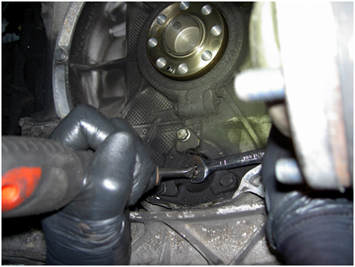
With a flat sturdy screwdriver, hold the IMS center shaft from rotating while loosening and removing the center nut with a wrench or a pass-through socket.
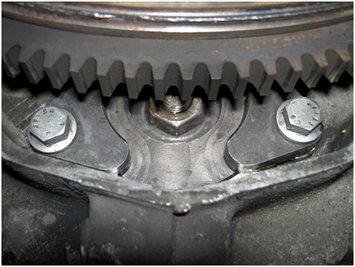
STEP 7: Remove the three flange support bolts.
Using a couple of pry bars, or two strong flat-bladed screwdrivers, slowly and carefully pry the flange out of the engine. Rotate the pry bar so that you apply pressure evenly around its perimeter.
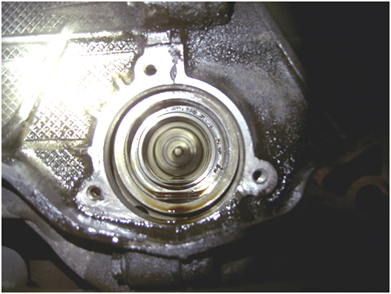
STEP 8: With the flange out, remove the bearing's retaining C-clip.
NOTE : C-clip will not be reused.
STEP 9: Insert the IMS Removal Tool.
STEP 10: ... and thread the center bolt onto the IMS bearing shaft. Tighten it by hand. Tighten the tool's center nut by hand all the way down making sure that the IMS Removal Tool is completely seated at the base of the engine block.
Hold the tool's center shaft with a socket or wrench so that it doesn't rotate, and slowly tighten the nut until the bearing is released.
STEP 11: You might hear a loud "pop" which is normal. Continue tightening until the bearing comes looses and can be pulled out completely.
STEP 12: Thoroughly clean the bearing seat and remove any debris, engine oil, etc
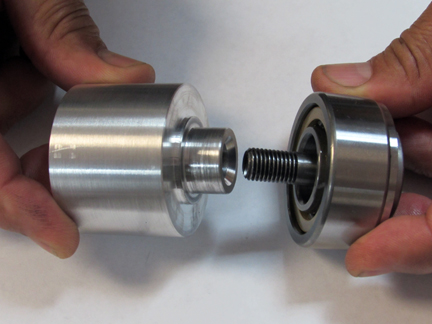
STEP 13: The Eternal IMS Fix Insertion Tool (Bearing insertion tool for all 1997-2008)
Place the new bearing with the center shaft in place into the insertion tool.
STEP 14: Place the new bearing with the center shaft in place into the insertion tool.
IT IS IMPORTANT TO USE THE PROPER SIDE OF THE INSERTION TOOL
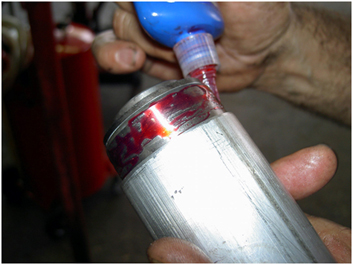
STEP 15: Put a bead of thread locker onto the outside of the bearing
STEP 16: Carefully present the insertion tool with the bearing and center shaft in place. Drive the bearing and insertion tool with a brass mallet until the tool seats completely against the IMS surface. The insertion tool must drive the bearing until the tool bottoms against the IMS surface. The bearing insertion is now complete.
Do not drive the bearing any further.
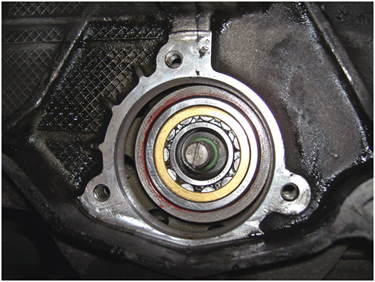
STEP 17: The newly installed bearing should look like this. Clean out the excess thread locker.
STEP 18: Thoroughly pre-oil the new bearing
STEP 19: Smear a bit of grease onto the new flange's O-ring to allow for an easier installation. Thoroughly clean each one of the three OEM flange bolts. Install the new bearing support flange in place.
Be careful not to push in the bearing's center shaft.
STEP 20: Use a flat screwdriver and turn it counter clockwise (ccw) to get the first two of the three threads of the center shaft exposed.
STEP 21: Once the first couple of threads are out, insert the center nut and tighten by hand.
You may need to use a pry bar to center the flange so that it's perfectly aligned. Also make sure you align the three flange holes with the threaded engine holes.
STEP 22: With a new flange centered, carefully tap it with a brass or rubber mallet, being careful not to hit the bearing's center shaft
STEP 23: Put a bead of threat lock onto the three clean flange bolts.
STEP 24: Insert the three flange bolts and slowly tighten each bold a few turns and move to the next bolt to assure that the flange is driven in perfect alignment. Keep tightening a few turns at a time until all three bolts are completely seated.
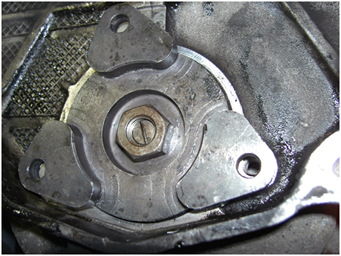
STEP 25: After the flange is in place, tighten the center nut. You may have to hold the center shaft from rotating using a flat screwdriver just the opposite of when it was loosened.
Tighten the IMS bolts to the following specs:
- Use Lock Tight on all IMS hardware.
- M 6bolt13-15 ft/lb
- M 10 nut 30-35 ft/lb
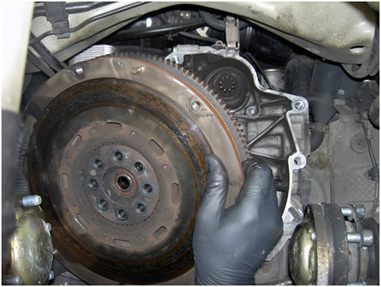
STEP 26: If you need to replace the Rear Main Seal (RMS) this is the time. Use a strong metal pick to pull out the damaged seal and install the new one in place. Follow the RMS' installation procedures (depending on the manufacturer). Remove cam holding tool. Remove crank lock pin. When all is in place and tightened to the correct torque values, reinstall the flywheel, clutch and transmission and fill the engine with the correct amount of oil.
Torque values:
- IMS Bearing Flange Bolts to Engine: 13-15 lb-ft
- IMS Bearing Shaft Center Nut: 30-35 lb-ft DRY- USE THREAD LOCKER (loctite)